Growing up, my family was never huge on nightly dessert. Yes, Ice cream was always an option, and there was always a yummy dessert on the table for every special occasion and holiday, but it was never a nightly thing for us.
Pies are definitely my favourite dessert. They can be so simple, but so elegant at the same time. Sweet… Savory… Healthy… Not so healthy!… Dessert… Main course… Breakfast… The options are limitless! I was always amazed at people who could bake them. I can remember my mom asking my grandmother to teach her how to bake pies. They spent a fall Saturday afternoon mixing pastry, slicing apples, and cutting my grandmothers signature wheat design into the crust. It seemed like 40 pies came out of the oven that day. One of my favourite memories of a day at Grandma’s. For some reason, from that moment forward I always thought that pies were a big deal… Not something that could be made up an hour before dinner, just because.

After marrying into the Blair family, I quickly learned that dessert was just as important (and as good!) as the Entree course! Scott’s mom would whip up a cheesecake… a trifle… a cake… a dozen cinnamon buns… like it wasn’t a big deal. It would always come out of the oven just in time to fill the empty void in our almost full tummies after every dinner. This always amazed me! I married a secret baker. Scott worked as a summer student in a local bakery for many years. I never thought I would say this, but Scott’s pie rivals that of my grandmothers. Scott doesn’t use a recipe, the palm of his hand serves as the measuring cup and this eyes are the timer. Every time his pies are perfection. From the day I married him, I swore I would never learn how to bake… I could just rely on him. But then came that day that we had to make pies for a family event and Scott had to work. Scott’s mom and youngest sister Kara taught Hilary (Scott’s middke sister!) and I how it was done… It is no where near as hard as I once thought, and it a very gratifying thing seeing your masterpiece come out of the oven. That, and the look on the husbands face when he sees what he gets to devour is priceless!
I’m really enjoying baking these days, so I am going to try to make as many different pies as I can. There are hundreds of options out there. Maybe I will make one a week… maybe multiple a week… maybe I’ll take a few weeks off. I’m not promising any regular schedule right now, and I’m definitely not going to eat them all so keep an eye on your doorstep friends!!
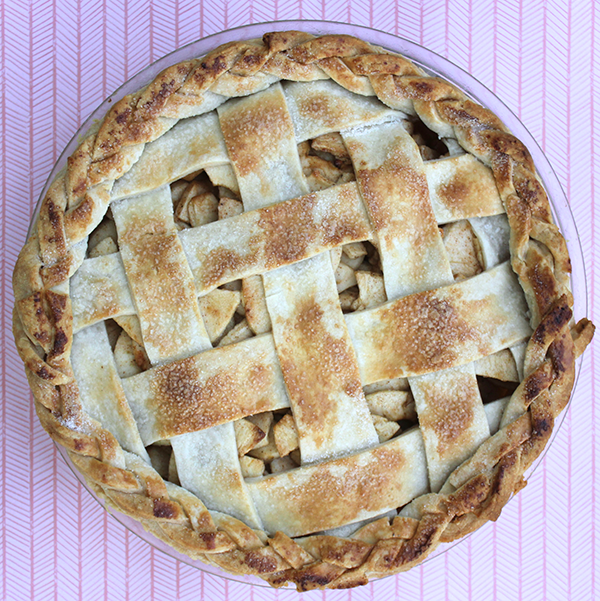
Pie No. 1: The Classic Apple Pie
Ingredients
Pie Crust
Pie Crust Ingredients and Recipe
Apple Filling
- 2/3 cup sugar
- 1/3 cup cornstarch
- 1/2 teaspoon ground cinnamon
- 1/4 teaspoon nutmeg
- 1/4 teaspoon salt
- 3 1/2 pound Granny Smith, Golden Delicious, and/or Braeburn apples, each peeled, cored, and cut into wedges (I cheat and use a apple peeler/corer/slicer – do it all at once!)
- 1 tablespoon fresh lemon juice
- 2 tablespoon butter or margarine, cut up
- 1 large egg white, lightly beaten (for crust egg wash)
- 1 teaspoon sugar (to make your crust sparkle)
What’s next?
- Preheat oven to 350 degrees.
- Follow my pie crust recipe. Typically this recipe will make 4 crusts, however I usually use a deep dish pie plate, so I get 2 crusts (with some extra to make a mini gallette!). For this recipe you should 2 crusts – one for the bottom (duh!) and one for the top. You can make the top as fancy (lattice crust anyone?) or as simple (flat rolled out crust top – don’t forget your air vents!) as you would like.
- For the Filling: In large bowl, combine sugar with cornstarch, cinnamon, nutmeg, and salt. Add the peeled/cored apples and lemon juice, and toss to coat evenly.
- Ease your rolled out dough into your glass or ceramic pie plate. Gently press dough against bottom and up side of plate without stretching. Trim dough edge, leaving 1-inch overhang (depending on your desired crust finish). Spoon apple filling into pie crust; dot with butter.
- Roll remaining disc for top crust into 12-inch round. I cut 10 stripes to make a lattice top, but you can also place the rolled out crust right over the filling and bottom crust.
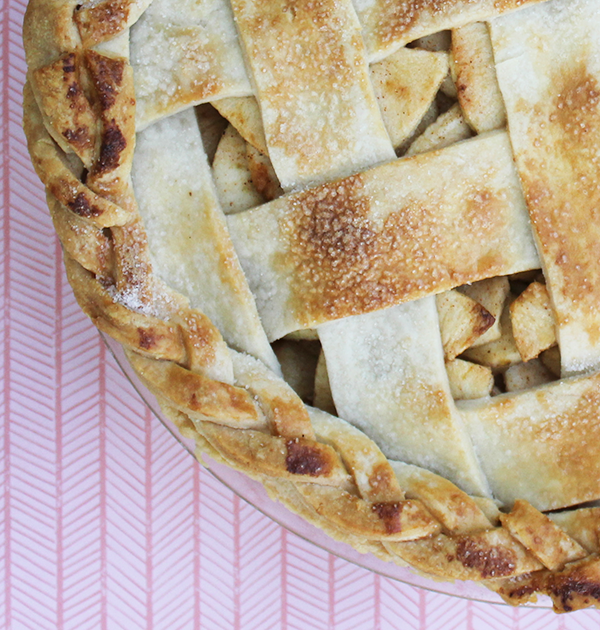
- Trim pastry edge to desired length. I opted to braid my crust which I will teach in a later post! If braiding isn’t for you, you can leave a 1-inch overhang. Fold overhang under and then make decorative edge.
- Brush crust with some egg white. Reroll trimmings. Cut short slashes in round to allow steam to escape during baking (remember those air vents I reminded you of before?).
- Bake pie 1 hour 10 minutes or until apples are tender when pierced with knife through slits in crust. Every oven is different, so keep an eye on your pie! Deep dishes will take longer. Regular dishes not as long. I sense some math coming in to play here!
VERY USEFUL TIP: To prevent over-browning, cover pie loosely with tent of foil after 40 minutes. You pie will only brown if uncovered!
Olive says “Apples… This is a healthy pie, right Ma?”
Buon Appetito!!
